
Table of Contents
Do you have an Octoprint server for your 3D printer? How about making an additional display to show your current print status? Or how about a monitor you can pretty much place anywhere in the home? Keep reading to learn how to create a Wemos D1 Mini Octoprint monitor! Credit goes to Qrome for the instructable and Chris Riley for extra guidance!
What you’ll need
- Wemos D1 Mini (ESP8266)
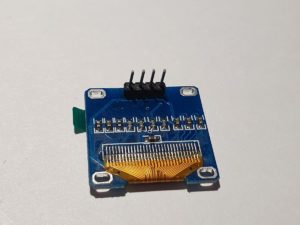
- 0.96″ OLED 128×64 display
- 4 Cables or cable headers (these came with my screen)
- 3D Printed housing
- Soldering iron + solder
- Arduino Code for Print Monitor
- Raspberry Pi with Octoprint installed

0.96″ OLD Screen, Wemos D1 Mini, Cables and headers
Let’s solder on!
The next step for the Wemos D1 Mini Octoprint Monitor is to wire everything up, so get your soldering iron heated up and we’ll wire with the following configuration.
Let’s first get the headers soldered in place. If you don’t have any headers, you can directly solder the wires into place if preferred. For the OLED screen, four headers are all you need to solder in.
For the Wemos D1 Mini, you need to solder headers into the following holes:
- D2
- D5
- 5V
- G

That’s the soldering all done! Now for the wiring, which goes from the OLED screen to the D1 Mini. If not using headers, solder the wires directly.

- VCC connects to 5V
- GND connects to G
- SCL connects to D5
- SDA connects to D2
Now that is all done. We now need to program the device.
Programming
With the hardware in place, it’s time for the nitty-gritty part! With the Arduino Code for Print Monitor downloaded, unzip this and go into the printer monitor folder. In here you will find printermonitor.ino. By opening this, this will open up Arduino IDE with some of the required libraries. If not, you can download and install Arduino from their site.
We will need to install a few configurations before we can compile and upload to the Wemos D1 Mini Octoprint monitor.
Firstly, we need to install the board. Within the Arduino software, go to File> Preferences. At the bottom, you will see a field for Additional Boards Manager URLs. Stick the following in here – http://arduino.esp8266.com/stable/package_esp8266com_index.json (If you require multiple entries in here, you can separate them with a comma) Then click OK.
![]()
![]()
Secondly, go to Tools> Boards> Boards Manager and in the search box at the top, type in esp. Within the results, look for the following:

I found version 2.4.1 worked without any issues for me, but feel free to install the latest version. Click install! Once installed, you can close this window.
Library installs
The Wemos D1 Mini Octoprint Monitor requires some additional libraries to be installed within Arduino too. Within the Arduino software, go to Sketch> Include Library> Manage Libraries…
The first library to install is the Wifi Manager, so in the search bar, type in wifi manager and install the following:

Next to search for is Arduino Json. Search for json and install the following:

Finally, next to install is the OLED library. Search for 1306 and install the following:

That’s the nitty-gritty stuff out the way! The final thing to do now is installing the driver for the Wemos D1 Mini. The driver can be downloaded from Wemos Electronics. When successfully installed and with your Wemos D1 Mini plugged in, within your Device Manager on your computer under the Ports, it will show as USB-SERIAL CH340 (COM#) #being your port number
If this does not show, use the driver, you just downloaded to uninstall then re-install again which should remedy this.
Time to upload!
Now that we have all the configuration in place, it’s time to upload it to the Wemos D1 Mini.
In the Arduino software, go to Tools> Boards and choose WeMos D1 R1 & Mini then go to Port and ensure the Port your device is on is listed. Everything else can stay as it is.
Now hit the upload button on the Arduino software!
At the bottom you should see a lot of text scrolling through while it does its thing, and if all successful, you should see Done uploading at the top. In addition to this, you should see the blue light on the Wemos D1 Mini flash while it uploads. Your display should light up, and we are then ready for the final step!
The setup
Now that we have uploaded everything, we need to connect the Wemos D1 Mini to our wireless network.
As we have the Wifimanager library installed, this makes the Wemos D1 Mini and AP hotspot so that it will broadcast its SSID. This will show on the screen when you power it on.

Connect to this SSID either through your laptop or mobile phone by searching for available wireless networks and once connected, if using your phone, you should be able to get the IP address of the device if going into the settings for this SSID. Take this IP address and then enter it into your browser which will then allow us to set up the initial connection within the Printer Monitor web interface. I find all of this is easier to do on your mobile phone.
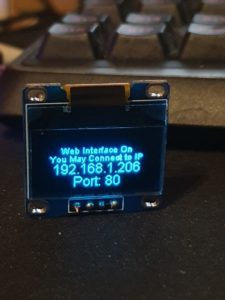
Go to Configure Wifi, and this should show you a list of your available networks. Choose your network and stick in your password and click Save. Your small OLED screen will now display the IP address for you to connect to so you can manage the settings of the Octoprint Monitor.
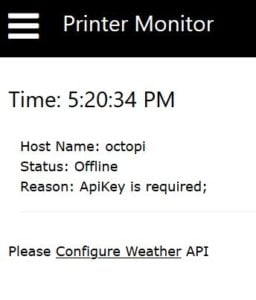
Printer Monitor Web Interface
Go to the IP Address that was shown, and if prompted for a username and password, the default is:
- Username: admin
- Password: password
Once in, click the 3 bars at the top then go to Configure

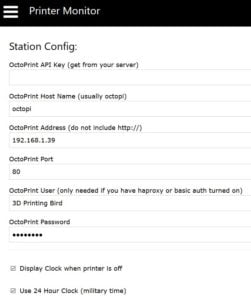
This is where you set up the connection between the Wemos D1 Mini and Octopi. Log in to your Octopi instance, click the spanner to go to the settings and then API. Copy your API key and paste into the corresponding box.
Also, stick your Octopi username and password if you have one set. (This is separate to the Raspberry Pi login) In here, you can also change the time zone, colour scheme and set to a 24hr clock, in addition to a few other settings.
There is also the option of having your local weather displayed when the printer is off, which will require signing up to the open weather map site, however, is free.
Once everything is in place as to how you want it, click save at the bottom and that’s it! You are done, and your display will now scroll through the settings of your printer!


Putting it all together
Here comes the fun part of putting everything together into a finished product. I have my housing printed for it using Qrome’s creation from Thingiverse.
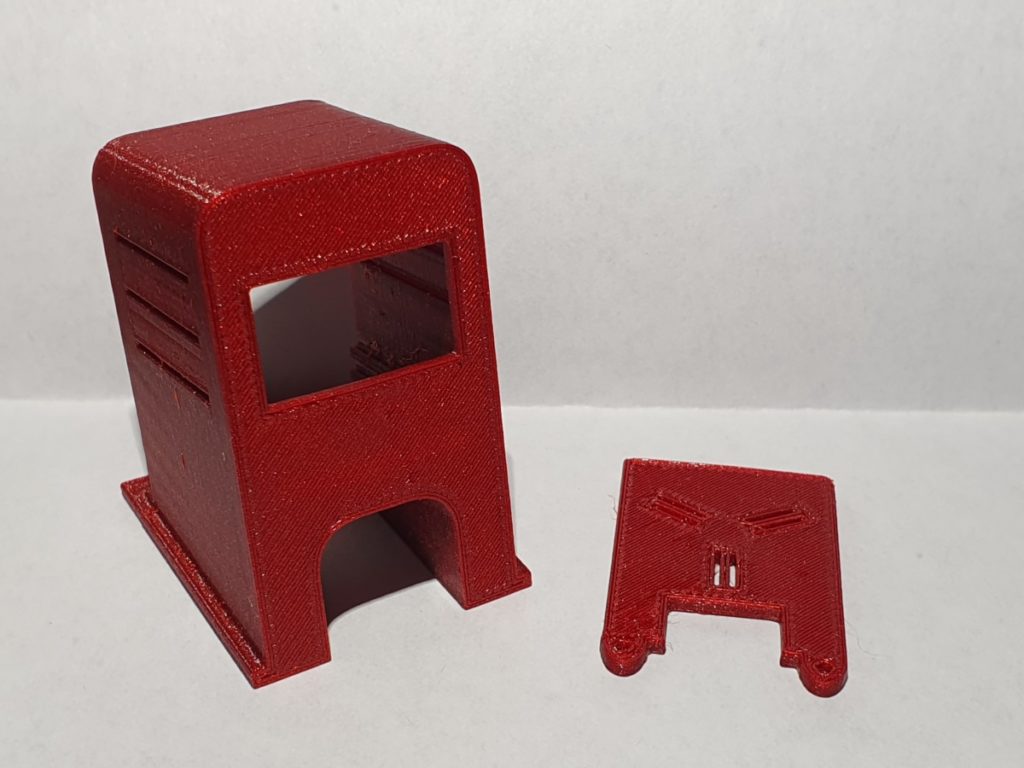
I used Eryone’s Galaxy Red PLA for this and very pleased with the result! Also, the main body is scaled up to 102%, and the backplate to 101% in Simplify3D so the OLED screen fits without being too tight and the back fits on nicely. Just slot the screen into place with the headers at the bottom. Secure the display with some blu-tack or hot glue and the Wemos D1 Mini slots in at the bottom. Stick on the back cover, and plug it in!


Also, to make this portable, you can power this via a power bank to allow you to take it around the house with you!
I hope you have enjoyed this tutorial, and if you feel there is anything I have missed, or you’d like to know more, then please leave a comment!
Why not check out Bondtech BMG Extruder on Creality Ender 3 Pro or Eryone Black Glitter PLA -Is all that glitters gold
Also, don’t forget to sign up to our new monthly newsletter! – Sign up here