
Table of Contents
When I first heard about Creasee and looked at the CS30, I saw the Skywalker had just been released and immediately wanted to give it a whirl as well. Some of the upgrades featured on the Skywalker are really interesting to see on an entry – mid grade printer.
Features of the Creasee Skywalker 3D printer
Creasee’s Skywalker 3D printer has several prominent features that you should know about. One of the most notable is the upgraded extruder from the CS30. The Skywalker 3D printer features a Bondtech clone, which should improve the feeding, especially of more flexible materials. The Y-Axis has also been updated to feature linear rails, allowing for a more study print surface and should allow for quicker speeds and more accurate printing. In addition, Creasee added belt tensioners to both the x and y axis, which is a great feature for fine tuning your printer.
| Product Name | Skywalker |
| Print Area | 300x300x400mm |
| Print speed | 20-100mm/s |
| Max Bed temperature | 100C |
| XY positioning accuracy | X/Y: .0125mm Z: .002mm |
| Filament Diameter | 1.75mm |
| Supported Files | .STL, .OBJ, .PNG |
| Nozzle diameter | 0.4mm |
| Max nozzle temp | 280C |
| Supported Materials | ABS, PLA, HIPS, WOOD, PC, PVC and more |
Unboxing the Creasee Skywalker
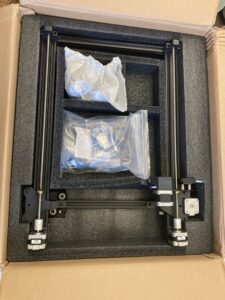
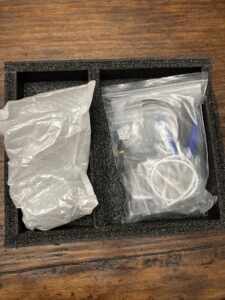
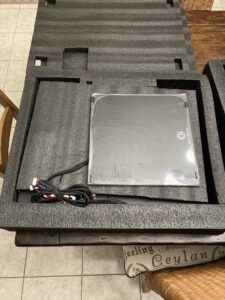
The Creasee Skywalker comes packaged really well, as expected after the CS30. Each layer is protected well from any jostling during shipping. Unfortunately, my unit was missing the linear rails upon delivery. After Contacting Creasee, they could get me replacement rails for the Y-axis. After a few shipping delays, the rails arrived and could be installed on the printer.


Assembly of the Creasee Skywalker FDM 3D printer
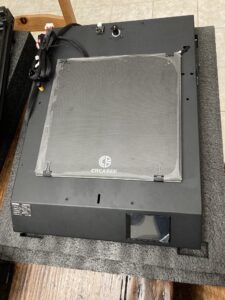
Assembly should be fairly straightforward on the Creasee Skywalker 3D Printer. The printer comes in 3 sections to install: the base, the upright gantry, and the hot-end carriage. I had the extra step of installing the y-axis rails and gantry, which proved a little challenging. Definitely doable for anyone with some mechanical inclination. Under normal circumstances, there are only 13 screws to install to get the printer up and running.
How To Level The Skywalker 3D Printer
Once the Skywalker is all assembled, you will need to level the bed. This is a manual process on this 3D printer, meaning that each point is moved to, the knobs turned, and using a piece of paper as a ~2 thousandths guide, adjust the nozzle to the bed. The paper should be just taught across all 5 points. Luckily, despite being manual, the Creasee Skywalker makes it a little easier with a firmware add in to move the nozzle to 5 points across the bed.
Importing Cura Slicer Profile
Before 3D printing anything, you will need to add the printer into Cura. If you are on the latest version, Ulitmaker has actually added Creasee in as an option to the default printer profiles list. if not, see the video below for an example of how to import a profile for the printer. One thing to be sure of when adding the Skywalker to Cura, is to ensure that the heated bed is enabled in the slicer profile. The import from Ultimaker does not have this selected by default.
First 3D Prints Off the Skywalker
The first few prints that I tested off of the Creasee Skywalker 3D printer did not go quite as planned. I had several issues with bed adhesion at first. After reviewing settings, I found that the heated bed setting was not correct, as stated above. Once I fixed this setting, I still had some issues with warping and adhesion on this bed. I was able to overcome this by a good cleaning of the glass bed, and using a thin film of hairspray on the glass prior to printing.
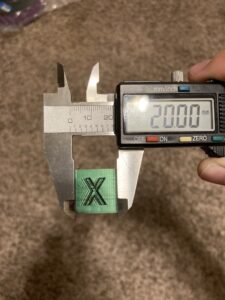
XYZ Calibration Cube
As always, I will test my printers with an XYZ calibration cube, followed by I had several failures of the cube, as stated because of the bed heating issue. Once I got the heated bed enabled on the Cura profile, the XYZ calibration cube was almost spot on all dimensions.

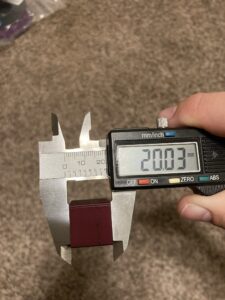
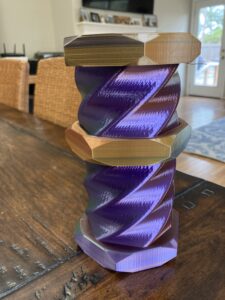
3DBenchy Torture Test
The 3DBenchy torture test was printed with Matterhackers Quantum filament. As you can see in the pictures, I had a layer shift in the Y direction. Not entirely sure why this happened, but could have been bumped while printing or the belts may not have been tight enough. This is the only print that I have had any layer shifts on so far. You can also see that ghosting is pretty clear in the x direction. The ghosting needs to be dialed in with either a slower print speed (likely in my case as I am printing at 60mm/s walls and 80mm/s infill), by tightening belts, or by having a more sturdy base (bed springs, spacers, linear rails etc).


Loyal Moses Print Challenges
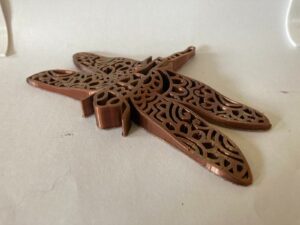
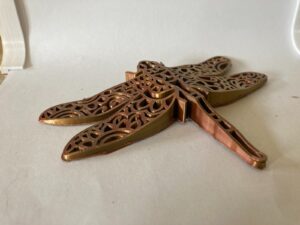
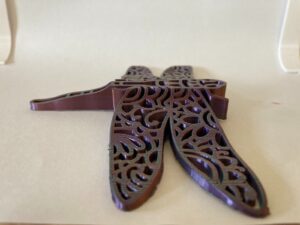
Next, I did a few of the Loyal Moses print challenges. These are found on his discord channel but the models can be found on printables.com The first of the Loyal Moses challenges I did was this dragonfly, which I printed twice. Once in Yousu’s Gold/Copper/Black Tricolor PLA, and once in their Purple/Green/Copper PLA. overall both of these came out pretty well. However, I definitely like the Purple/Green/Copper better!


The second print was also a Loyal Moses Discord print challenge. This one was a Fidget can koozie. I printed this using the same two tri-color filaments from Yousu. I still have some ghosting or ringing issues on this print, again likely due to the higher speeds, as I did ensure the belt tensions were correct before this print.


The PROS and CONS of the Skywalker 3D Printer
If you are considering getting the Creasee Skywalker 3D printer, Here are a few things to look at prior to purchasing.
Pros
- The print area of the Skywalker is fairly large for a printer at this price point. It is larger than your typical entry level printer, but is also priced above that as well.
- The touchscreen has pleasant features built in, especially for the leveling help.
- The upgraded linear rails are a delicate touch. These rails help with y axis stability and will allow for slightly faster printing speeds. The V-wheels that come standard on most entry level printers are really not appropriate for this or the x-axis, so to have them in stock on the Creasee Skywalker is definitely a perk.
- The bondtech clone extruder should allow for better feeding of material over the CS30’s Mark 8 extruder.
- When printing at higher speeds, the print seems to hold tolerances fairly well.
Cons
- The Skywalker is absolutely massive at the base. The integrated screen and setup are great, but the footprint is even larger than the CS30 for the exact same print area.
- The fans are pretty loud when the printer is on. This can be remedied with replacement silent fans, but as long as the printer is in the other room, it’s not overbearing.
- Manual levelling seems to need re-levelling every print. Stronger springs or fixed silicone spacers should be able to fix this. I have also read that some printers may suffer from this condition when the x-carriage is too heavy and drifts the axis down over time. I am still looking into this currently.
- The second page of my options on the touch screen disappeared and just show boxes. Unfortunately, it was gone by the second or third print, so I did not see what all the other features were. I remember the Wi-Fi setup being there though, so I assume that there is a module that can be expanded to allow direct connectivity. I will attempt a firmware re-flash to fix this issue.
- The price point when looking at other printers of the same size is a little over the average. Most of the others in the same price range, however, do not have linear rails or a touchscreen.
What’s the final verdict on the Creasee Skywalker FDM 3D printer
So if after this review you are considering purchasing a Creasee Skywalker as your next 3D printer, you can find it on several online retailers at prices ranging from $349 at geekbuying.com to around $400 (Orion 3D Printers). If the print area is the only aspect of this printer you are looking at, I would recommend going with the Creasee CS30, or even another brand’s 300x300x400mm beds, as many are below this price point. With the linear rails, and bondtech clone extruder that comes on this printer, this may be a good replacement for your Ender 3 if you are ready to upgrade to something a little bigger. Overall, I would say this is a decent and capable printer, but is not one that I would choose over some of the other options on the current market, especially for a first 3D printer.