
Table of Contents
Now it is time to read a laser-newbie’s review about this 5W Diode Laser Engraver from Longer3D. Prior to the release of this kit from Longer, I had not considered purchasing a Laser Engraver. Owning and enjoying multiple Longer FDM 3D printers, lead me to investigate the Longer Ray 5 Laser Engraver.
Although I have never laser burned before, I am familiar with vector images, photo editing and similar hardware used with 3D printers. Even with my previous hobby knowledge, laser engraving and cutting truly is a new hobby for me. Therefore, we can learn about the Ray5, software and techniques together.


Specifications and Features of Longer Ray 5 Laser Engraver
Ray 5 – Hi-tech Laser Module
The laser engraver has state-of-the-art latest FAC laser technology which provides an option for compressed laser point. In terms of the size of the laser, it is 0.08 x 0.08 mm. This means that this is an ultra-focused laser point. Also, more focus on the laser point means more energy. Which directly translates to finer cuts and designs of higher quality. The high focus of laser point and high energy makes the engraving to be stronger. In terms of power output, the module outputs reach up to 5-5.5 W.
Longer3D – 32-bit Chipset
The Longer Ray 5 laser engraver has an ESP32 chipset which has an operating speed of 240 MHz. This means the chipset is much faster than other contemporary machines. Especially, when it comes to 8-bit chipsets, then there is a substantial difference in operational speed. Another major feature of the chipset is that it has a Wi-Fi connection. This means that you can easily control the design by using the internet.
Protection and Safety
This laser engraver has some special safety and protection options. It means that if the machine is put in motion during operation, then the machine is shut down on its own. Furthermore, if there is a flame or heating inside the engraver then the machine will shut down on its own. These features of the engraver make it very safe for operation.
Another protection available in the laser engraver is eye protection. The acrylic cover of the laser module serves as a shield for the eyes against the laser. Despite the protection, it is recommended that you wear eye protection while working with the laser engraver.
Compatibility With Windows/MAC/Linux System
The Longer Ray 5 laser engraver is compatible with all contemporary operating systems. The inbuilt operating system of the free engraving software is the LaserGRBL. However, in case you want more features, you can also go with the paid version in the form of LightBurn software. In terms of file types, the engraver supports all major types of design files. This includes BMP, jpg, png, SVG, DXF, etc.
Ray5 Upgrading Options
Longer Ray 5 laser engraver comes with an option to upgrade its laser engraver. The features available for upgrading are the power supply and mainboard support to more powerful 8W/10W laser module.
Longer3D Touch Screen
The laser engraver is offering a touch screen of 3.5 inch which makes the interaction with the engraver easier. This feature also enables the user to work on the design without having to connect it to a computer for control.
Offline Control
In addition, the Ray 5 engraver can easily be loaded with the design by using a TF / microSD card. This means you can upload your file to the engraver even if you are not connected to the internet.
Longer 3D Ray 5 Packaging and Unboxing
My Ray 5 Laser engraver shipped directly from Longer’s warehouses in China. It arrived in a custom printed box with images of the machine. As you can see in the slideshow below, it was very well packaged. Custom foam, extra wrapping and labeled bags were used. Besides the professional shipping and labeling, unboxing was easy. As usual, it took longer to photograph than to actually unbox a product.
-


- Custom Packaging
-
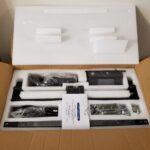
- Securely Packaged
-
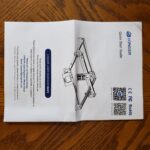
- Printed manual
-

- Unpacked
-

- US power plug
-

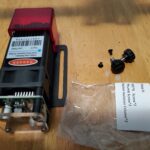
- Diode Laser safely packed
-

- Safety glasses
-

- Touch screen
-

- Tools and parts
-

- Labeled for each step
-

- Impressive labeling
-

- More bags
-
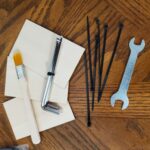
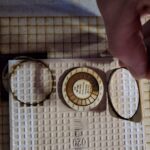
- Useful tools and supplies
-
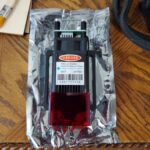
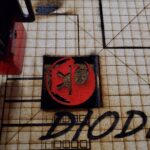
- Diode – No brand labeling
-

- Diode board view
-
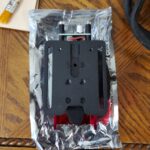
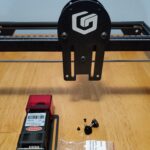
- Diode mounting plate
-

- Diode safety shield
-

- Gantry subassembly
-
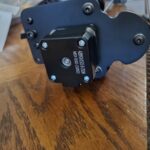
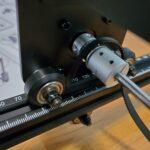
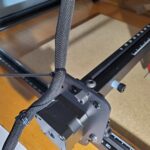
- Typical Nema Motor
-

- Useful grid markings & Assembly pictures
Ray 5 Assembly
The printing manual and official Longer3D YouTube unboxing video clearly show how to assembly the Ray 5 Diode laser kit. Full unboxing, assembly and initial power-up should average less than 30 minutes. The build components are similar to most 3D printers and will be familiar to printing hobbyists.
This YouTube video shows how to properly adjust the eccentric nuts and wheel tensions. Although the video features a 3D printer, the concepts and hardware are identical. Proper tension of the pulley wheels against the aluminum extrusions will minimize gantry wobbling, premature wheel wear and laser head movement issues. Over tightened eccentric nuts will cause erratic motion and flat spots on the pulley wheels. If you ever need replacement wheels, they are common and used on most 3D printers. This will make your product searching much easier.
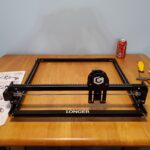
Assembly Tip: When installing the nuts and screws that hold the belts in place, move the nuts as far to rear as possible. Otherwise the laser’s gantry will hit the nuts before reaching the full 400mm front-to-back Y travel distance.
-

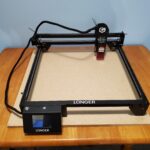
- 400×400 is big
-

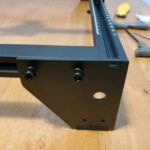
- Corner bracket
-

- Bracket asssembly
-

- Corner assembly
-

- Quick checking
-
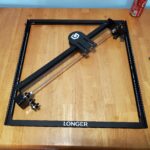
- Size reference
-
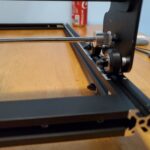
- Gantry assembly
-
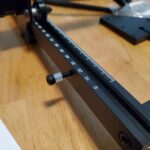
- Stop bolt
-

- Corner Feet
-
- Easy assembly
-

- Screen corner
-

- Gantry belts
-
- Belt looping
-

- Insert and twist belt nut
-

- Push belt screw all the way to the rear
-
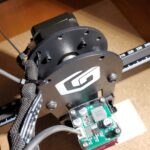
- Diode parts
-

- Diode mounted
-
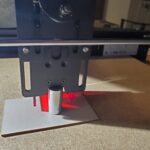
- Focus gapping tool
-
- Clean up wires with zip ties
-
- Zip ties
-

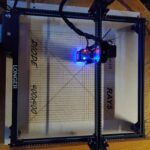
- Test power on via touch screen
-
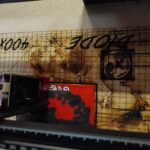
- test firing complete and through the wood

Power On and Testing with the Touch Screen
Before plugging in the Ray5, be sure to select the correct voltage on the power supply. It is typically a red switch labeled 220v and 115v. Europe and the majority of the world use 220V and 50HZ for their standard electricity. The United States and a few other countries use 110/120V 60HZ for household electricity. Selecting the wrong voltage may damage your Laser Engraver kit and possibly cause electric faults.
Once your machine is turned on, you will get a welcome screen and a useful touch screen. Currently inexpensive laser kits with touch screens are quite rare. Instead setup and use requires a constant USB/Serial connection to a computer.
Longer3D’s touch screen allows for motion controls, laser testing, print project selection plus a few configuration settings. Anyone familiar with a 3D printer, will be familiar with the type of options available. The touch part of the screen makes it even easier for all owners to use regardless of prior experience or hobbies.
Extra Info – On-Board WiFi
Although the built-in WiFi connection was not reviewed, several videos show impressive results. In addition to connecting to the printer remotely, the built in web interface allows full control of the machine. This includes motion, loading files onto the SD card and accessing the machines options. Those options include all of the default firmware parameters with descriptions of each setting. Personally, I wish this was included on every FDM 3D printer as well.
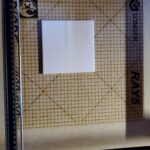
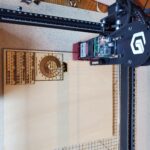
Setting up a Longer3D Ray 5 Work Area
Laser Engravers are normally used with a piece of scrap wood or a metal mesh plate. The wood is typically called a waste-board; while the plate is frequently an expanded metal mesh assembly. Both protect will protect the table under your Ray5.
Waste-boards can be any piece of flat scrap wood. Metal mesh plates are very useful when using a laser to cut/burn thru material. After all, the metal will not catch fire like a wooden waste-board. While still learning to use my Longer Ray 5, I have started with a waste-board made from a piece of 24×24 inch plywood. When I start to use my engraver mostly for cutting, I will purchase a mesh plate.
Included with the machine, Longer also provided mounting brackets, machine screws and wood screws. These can be used to mount the Ray5 securely in place. My Ray5 is currently attached to its first waste-board. Self-tapping screws could be used to attach the machine to a metal plate instead.
-

- Included brackets and screws
-
- Mounted
-

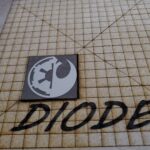
- Custom design in lightburn

-

- Custom text using Lightburn
-

- Big 400×400
-

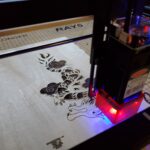
- Burn baby burn!
-
- Nothing sandpaper won’t fix
-

- Ta-Da !!!

-

- Sanding some scorch marks
-
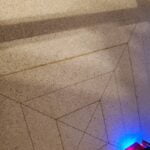
- Custom Grid
-

- Custom grid complete
Laser Engraving Software
Currently, there are two popular software programs used for preparing and burning laser projects – LightBurn and LaserGRBL. There may be other programs, but these are the two most popular I found during my initial research. LaserGRBL is currently free. LightBurn does require a purchase after the full trial period ends. Typically, I start with free programs when I find a new hobby. However, most of the tutorials I found used LightBurn. Therefore, I installed the program and started the trial period. Depending on how often I use my Longer Ray5, will determine if I purchase LightBurn or start learning LaserGRBL.
LightBurn was used for all the projects shown in my review. Overall, I found it easy to use after watching a few videos. Since I did not install LaserGRBL, I can not provide an actual comparison review at this time.
An additional website that may be useful is Imag-R. This site allows you to upload an image, edit it, select material / project type and preview the results of various materials. Then the final image can be saved and used in your preferred burning software. When using LightBurn, turn on “pass through” mode to use the files dither method.
Ray 5 Diode Test Projects
Burning, engraving and cutting wood is probably the most common and thought about a project for laser engravers. Many other projects are possible depending on the type and power level of your laser. I have started my review and hobby with wood, white ceramic tiles, and mirrors. Other materials are possible. A few materials should be avoided due to deadly and/or toxic fumes and excessive fire risks. The user manual lists a few materials that should never be used.
Thankfully, the Longer3D Ray5 includes motion sensors as well as heat/flame sensors. Theses sensors will reduce the risks of fires, but always use a laser engraver in a well-ventilated room. Additionally, enclosures and exhaust fans can be used to reduce the smoke and smell in your workspace.
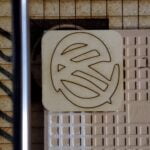
Wood Engraving
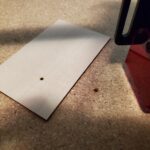
Working with wood, card stock, cardboard and paper is fun and relatively easy. Diode lasers, like the Ray 5’s, can be used on most types of wood. Cutting is slower and more difficult with diode technology. Obviously, wood is flammable. It is smart to keep a fire extinguisher nearby and do not leave your machine unattended.
After a simple power on test, via the touch screen, I started burning some small wood square. The Ray5’s micro SD/TF card contains a few samples gcode files for engraving.
Rather than taking my time and printing calibration files, I simply started using some recommended settings. Ray5 performed as instructed. It simply over or under burned my initial samples. Fine tuning your laser’s power and speed is required for each type of material, coating and thickness. Patience and a few hours of testing is required. Learn from my mistakes and other suggestions.
-

- Small engraving experiment
-

- A little over cooked
-

- Good results
-
- Experiment with painted wood
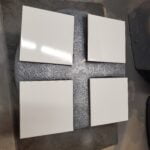
White Ceramic Norton Tile Method
Laser Engraving onto white ceramic tiles is a new idea I discovered while researching and joining a few Facebook groups plus a bulletin board forum. A popular method is known as the “Nickey Norton Method”. It uses white spray paint, paint thinner and normally white ceramic tiles. After burning the tile, you use paint thinner or other solvent to remove the remaining paint. Once your speed and power are dialed in for your paint brand, the results can be incredible. As a bonus, the etching is essentially permanent.
An additional method uses black spray paint and a negative color flipped image. After burning, you carefully brush off the paint dust. Next you seal the tile with a gloss or semigloss coating. Those projects look equally impressive, but do require sealing.
My initial test was done quickly without dialing in the settings. I just wanted to see this cool technique in action. The white paint method definitely works. Unfortunately, my speed was a little too slow. After working on my settings, I hope to get nice full gradients with darker “blacks”.
Besides adjusting speed and power levels, different brands of paint will provide different results. I will be trying different brands of spray paint and some without our built in primer.
-
- White tile prep work
-

- Black tile prep work
-
- Ready to start
-

- Burning before I bumped the power off 🙁
-
- Grey scale is not correct
-

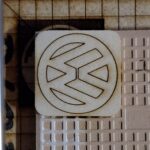
- Etching
-

- Etching complete
-

- brown results? Needs more tweaking!
-

- Getting better dark tone results
-
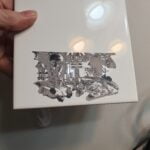
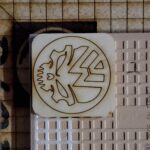
- Etched tile for a Mason/Shriner friend
-

- Etching complete
-

- Cleaned up and Ready for my friend
-

- Burn complete on black painted tile
-

- Before attempting to clean up
-

- Unsuccessful soot removal
-
- Second pass to burn off black paint layer
-
- First pass burned the red paint
-

- Look good – Not sure if soot will come off
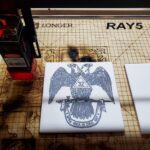
Mirror Burning
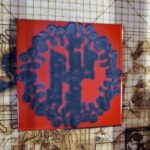
Projects using modern mirrors are another interesting idea. The Ray5 can burn off the backing of a mirror. Then the mirror can be displayed as-is. Alternatively, the back can be repainted with any desired color. Silver paint will make the mirror appear to be etched. Various colors can be fun depending on the design used.
Once again, I rushed my first attempt laser, burning a very thin and cheap mirror. Luckily, I had my waste-board in place. The Ray 5 was powerful enough to burn off the backing material, pass thru the cheap glass and engrave into the plywood waste-board. Now it has a permanent Star Wars tattoo. Normally, I encourage people to take their time and calibrate. I was obviously still excited and in a rush.
-

- Cheap Mirror ready to test
-
- Burn complete
-

- Oops – Too much power!
Longer Ray 5 Wood Cutting Projects
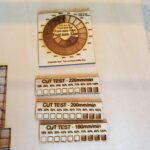
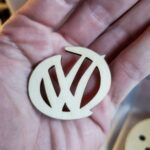
Typically, diode lasers are not well known for cutting wood. They are slower and less powerful than other types of lasers. Yet if the wood is thin enough, the Ray5 can cut. Multiple passes over the cut lines may be required. This is where calibration and testing are very important. A metal mesh plate will also help with the cutting process and reduce flame flare-ups.
Single and multiple layered project files can be located on various sites. Typically, they are for sale. Often the prices are reasonable and allow for selling of the finished project.
Initial wood cut test using the Ray5 was very successful. The cuts were clean with minimal back side scorching. Initially, my wood pieces were placed directly on my waste board. Next, I flipped some ceramic tiles and placed them under my project pieces. Using the included laser focus tube was very easy and allowed for proper distance every time.
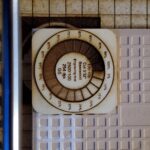
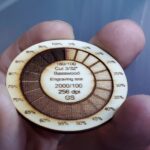
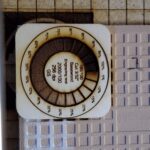
Longer3D’s Ray5 diode cut thru the 1/8″ – 3mm basswood easier that expected. Harder and thicker woods may require additional passes at slower speeds. Prior to starting detailed cutting projects, I finally performed some calibration burns. La Hobby Guy provided the files and techniques at his free forum. His YouTube channel was great for learning about LightBurn and lasers in general. Thanks!
-
- Cut and Greyscale Etching
-
- 2500 Speed
-
- 2000 Speed
-
- 2000 Speed
-
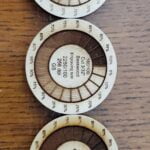
- Engrave comparisons
-
- Cut testing
-
- Success
-
- First Attempt with design
-

- Ooops
-

- Etching experiment
-

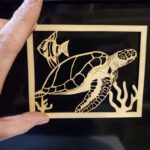
- Cut and etched
-

- Edited design
-

- Successful revision

-
- Getting there
-

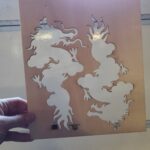
- Sheet 1 of 2 done

-

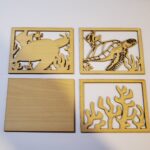
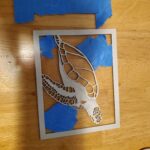
- All four completed
-

- Cool

-
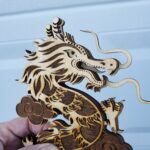
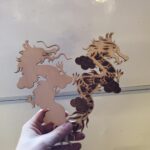
- Great details
-

- Turtles Done – One to redo
-

- Test assembly
-

- That is better
-
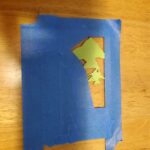
- Ready for some paint
-
- Top layer tiny cut outs
-

- Four painted layers
-

- Hmmm time to repaint
-
- Time to start masking
-
- Here fishy fishy
-

- It needs more colors
-

- Almost done
-
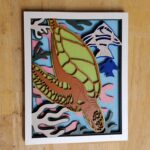
- Final paint
Potential Upgrades To The Ray 5 Laser Engraver
Out of the box, the Longer Ray 5 is fully functional and capable. Most of the upgrades I have found so far require access to a 3D printer. Since the Ray 5 is relatively new, machine specific upgrades are currently limited.
So far, I have found a few useful items than can be used with the Ray5:
* There is a simple holder for the metal focus cylinder. This will ensure the doesn’t roll away, and perhaps prevent disappearances. Thingiverse 5175754
* A remixed 3D printable screw assembly to adjust the focal distance without loosening two different screws. Thingiverse 5206567
Air assist nozzles, hoses and pumps/compressors can be be used to improve print quality. The air flow typically reduces the excessive edge burning associated with laser engraving and cutting. Using an air assist setup with other project materials can also improve the image quality. I have not researched this upgrade much yet. However, there are some 3D printable nozzle models available for the Ray5 already. Some people are successfully using small air brush compressors. They have the added benefit of being quiet with low output volume.
In addition to simple add-ons, Longer3D is developing a more powerful 10W diode laser module. No release date has been announced yet. A strong laser will allow for faster and/or lower output power gcodes. Since the laser module is a consumable that eventually needs replacement, lower power settings should increase the lifetime of a given laser.
Where To Buy The Longer Ray 5
The Ray 5 is on offer at a mere price of $359 on Longer3d’s website. You can check out the latest price and any discounts from this website too. This product is shipped directly from China through the express delivery system.
Longer3D Ray 5 Final Thoughts
Longer3D Ray 5 Laser Engraver is an easy to assemble kit. The rare inclusion of a touch screen and WiFi are helpful for new users and general machine usage. The ability to use a TF micro SD card, means that a dedicated computer is not required in your workshop. Built-in heat, flame and movement sensors allow for safer use of the machine at home or work.
Speed is limited only by Laser Diode technology. Laser modules are a consumable that eventually require replacement. Longer3D is developing their version of a stronger 10W diode. This will allow for faster burning and potentially deeper cutting. If you are in the market for laser engraver backed but a known company, consider the Longer3D Ray 5 Laser Engraver.